
The Complete Guide on How to Host Your Website with cPanel on Your Own Domain
For anyone with a passion for IT, the desire to create a personal website is a natural step. However, before diving into the world of web development, it’s crucial to understand the basics. This includes knowing how websites function, where to upload HTML files, how to secure a domain name, and selecting the right hosting service. In this guide, I’ll walk you through the process of hosting a simple HTML page that I’ve crafted, providing you with a hands-on demonstration of bringing your digital creation to life.
Understanding the Basics: A website is essentially a collection of files stored on a server, accessible via the internet. HTML files form the backbone of your site, dictating its structure and content. To make your website visible to the world, you’ll need to upload these files to a web hosting provider—a service that stores your site on its servers.
Registering a Domain: Your website’s domain is its address on the internet, like a digital street name. You’ll need to register a domain through a domain registrar, a company that manages the reservation of internet domain names.
Choosing a Hosting Service: There are numerous hosting services available, each offering different features and pricing plans. For a simple HTML page, a static website hosting service will suffice. These services are user-friendly and often provide a straightforward way to upload your HTML files and go live with minimal setup.
Step-by-Step Guide to Hosting Your HTML Page:
Select a Hosting Provider: Choose a hosting service that caters to static websites. Providers like W3Schools Spaces offer an easy-to-use platform where you can host your site with just a few clicks.
Create an Account: Sign up with the hosting provider using your email and set a password.
Create Your Space: Once logged in, look for an option to create a new ‘space’ or project. This is where you’ll upload your HTML files.
Upload Your Files: Navigate to the file manager within your space and upload your HTML files. Remember, the main file should be named index.html as it serves as the entry point to your site.
Preview and Publish: After uploading, you can preview your site to ensure everything looks as expected. If all is well, publish your site, and it will be live on the internet for others to see.
Hosting a simple HTML page is a great way to start your journey in web development. By following these steps, you’ll gain a better understanding of how websites work and take the first step towards creating your own unique presence on the web. Let’s embark on this digital adventure together!
In this demonstration, we’ll explore how to establish a web presence without incurring any costs. We’ll delve into the process of creating a domain, hosting it on a control panel (cPanel), and securing it with SSL—all for free. This hands-on guide will equip you with the knowledge to set up your website and prepare it for secure communication over the internet.
By the end of this demonstration, you’ll have a fully functional and secure website, all without spending a dime. You’ll have laid the groundwork for a professional online presence, and you’ll be ready to take the next steps in customizing and enhancing your site. Stay tuned for our next session, where we’ll complete the security setup and proudly display the ‘https://’ badge on your website. Let’s get started on this exciting journey into the world of web development!
Lets begin,
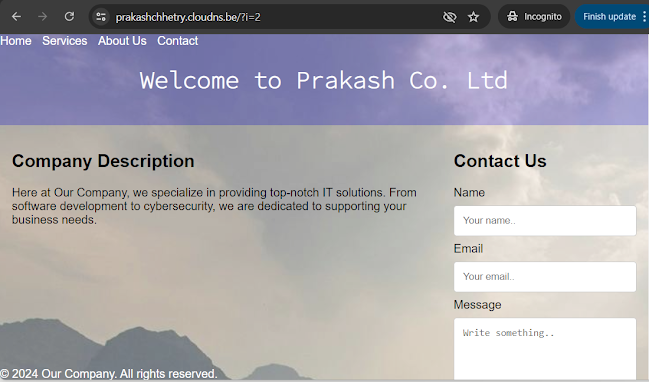
For this demonstration, I have created simple "index.html" file with html <head> and <body>.

The html page looks like this. I want to the index.html to open with my domain address and want to get it accessed over the internet.

In this demonstration, I have used “Cloudns” as my domain registrar which offers a
free DNS hosting service, which includes features like 4 Unicast DNS servers, 1
DNS zone, 50 DNS Records, and 500K DNS queries per month. I have registered free domain prakashchhetry.cloudns.be

“Byethost” offers cPanel hosting free trial FREE for 15 days. Thus, I have used “Byethost” hosting provider in this demonstration. To enroll to the free trail follow the steps below:
1.Open the URL: https://cpanel.net/ . Scrolling down, and click on "Free Trial"

2.Fill up the required credentials (for example: your name, emails
etc.) and hit submit button.

3.You will receive the email address soon after the
submission. Check your SPAM folder, If you do not receive it in “INBOX”.

4.In the email, you will receive the cPanel URL and the other
credentials. Open the URL and enter the “Username” and “Password” and click “Log
in”

5.Now, permit it to send email by clicking “I approve”.

6.You have successfully created the cPanel account. Now, lets work on the domain part. As mentioned earlier that I have registered the domain prakashchhetry.cloudns.be in CLOUDNS but want to host the webpage in BYETHOST. For that, we need to create a relationship between the cPanel
and the domain registrar.
Before moving to Step 7, lets know about A record:
An A record, short for Address Record,
is a type of DNS (Domain Name System) record that is used to point a domain or
subdomain to an IP address. Specifically, it maps a domain name to the
IPv4 address of the computer hosting the domain. Here’s a breakdown of how it
works:
- Domain
Name: This is the human-readable address of a website, like example.com.
- IP
Address: This is the numerical address where the website is hosted,
such as 74.125.224.72.
- DNS
System: This acts like the internet’s phone book, translating domain
names to IP addresses so browsers can load internet resources.
When you type a website’s domain name into your browser, the browser performs a DNS lookup to find the corresponding A record. If the A record exists, the browser receives information about which IP address to connect to, allowing the website to load.
7. Now, Let’s create an ‘A record’ pointing to the ‘BYETHOST’.

8.Click on “Add new record” and add
the IP address. Since, I want to host in BYETHOST.On raising a tickets, the support team suggested to point in the address 185.27.134.125. It seems like ifastnet.com is the parent company and ByetHost operates as a part of ifastnet. If you do not know how to add the A records, you can check in the next Step 9.

9.Select the Type and Add the IP Address where you want to point.

10.Now, back to the cPanel, go to “Domains” and click on “Addon
Domains”

Before moving to Step 11, lets know about Name Server:
A NameServer is a crucial component of the Domain Name System (DNS), often referred to as the “phone book of the Internet.” It plays a vital role in translating human-readable domain names into machine-readable IP addresses. When you type a website’s address into your browser, the nameserver is responsible for directing your request to the correct web server’s IP address.
Here’s a simplified explanation of how it works:
- You enter a website’s domain name (like example.com) into your browser.
- Your browser sends a request to the domain’s nameservers.
- The nameservers respond with the IP address of the website’s server.
- Your browser then requests the website content from that IP address.
- The server sends the content back to your browser, which displays the website.
Nameservers look like any other domain name, for example, ns-123.awsdns-45.com. They manage and store DNS records, which contain the information needed for internet traffic routing, such as where to send emails and which server hosts a website.
11.Enter your domain name and click “Add Domain”. But remember to set the domain “Name Server” to the hosting server before adding the domain otherwise it will not work.

12.Let’s go back to the domain registrar and set the “Name
Server”. Based on the records, now the “NS” of
prakashchhetry.cloudns.be is set to cloudns.net. As we have seen in the above
picture that, the requirement is to set to the “NS” of “BYETHOST”, so, lets delete existing “NS” records.

13.All the “NS” records are deleted.

14.Let's add the new “NS” records that were suggested while
trying to add the domain in cPanel.

Before moving to Step 15, lets know about Name Server and DNS Server:
Let’s clarify the roles of nameservers and DNS records in
your scenario:
- Nameservers:
They are indeed responsible for managing DNS records. When you set up a
domain with a DNS provider like CloudNS, you are given a set of
nameservers. These nameservers tell the rest of the internet where to find
the DNS records for your domain.
- DNS
Records Management: Even though nameservers are responsible for
managing DNS records, it doesn’t necessarily mean they store all the
records. In my case, CloudNS manages your DNS records, but you’ve pointed
your domain’s nameservers to Byethost.
- Delegation:
By pointing your nameservers to Byethost, you’ve delegated the authority
to respond to DNS queries for your domain to Byethost’s nameservers. This
means that any internet traffic looking for your domain will be directed
to Byethost’s nameservers for information on where to route the traffic.
- DNS
Hosting vs. DNS Management: There’s a distinction between hosting DNS
records and managing them. CloudNS still manages your DNS records, but
Byethost’s nameservers are now the ones that host these records and
respond to queries based on the information provided by CloudNS.
In summary, while CloudNS manages the DNS records for prakashchhetry.cloudns.be,
Byethost’s nameservers are the ones that the internet will query to get these
records. This setup can work perfectly fine as long as the DNS records at
CloudNS are correctly configured to point to Byethost’s nameservers.
15.All the “NS” records are pointed to “BYETHOST”. It will take
sometime to update the records.

16.Now, come back to the previous steps (Step 11), and click on
“Add Domain”.

17.Domain prakashchhetry.cloudns.be has been added to the
control panel.

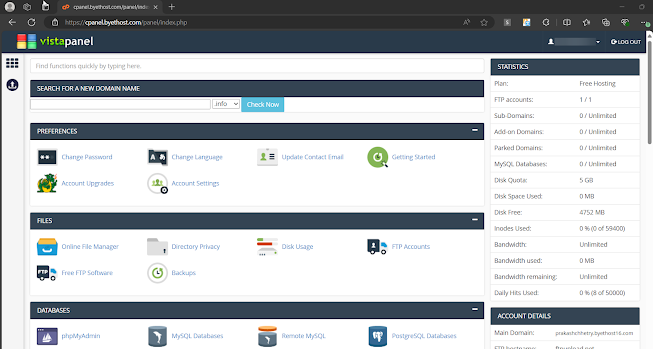
18.On clicking “Go Back” button, you will see the domain has
been added and also you can see the path of the root directory.

19.Now, it’s the time to upload the index.html file that was
created earlier it the beginning. On cPanel go to “Files” and click on “Online
File Manager” .

20.You can see that the folder prakashchhetry.cloudns.be has
been already created. Click to enter.

Before moving to Step 21, lets know about htdocs:
The htdocs folder is the default directory where web server software like Apache stores the files for a website. It’s essentially the root directory from which the server serves files when a web request is made. This means that any files you want to be accessible via the web, such as HTML, PHP, or CSS files, should be placed in this directory.
21.You will see the htdocs folder.Click to enter.

22.Inside the htdocs folder, you can see that index2.html is present by default. Since, we have already created the "index.html" page, delete the
index2.html by selecting and clicking on delete icon. You can also copy the
code and paste it here.


23.If required,you can also edit index.html page by clicking on the edit
button.

24.Now, with URL: www.prakashchhetry.cloudns.be , it will display the index.html page that was imported
in htdocs file. As for now, we have not used the SSL/TLS the
page may not work with the https://. Also, it may not work directly entering the URL : prakashchhetry.cloudns.be because yet page redirection etc. has not been used.
SSL/TLS in a web hosting server refers to the Secure Sockets Layer (SSL) and its successor, Transport Layer Security (TLS), which are cryptographic protocols designed to provide secure communication over a computer network. In web hosting, SSL/TLS is used to:
- Encrypt the
data transmitted between the user’s browser and the web server, protecting
it from eavesdropping.
- Authenticate the
server to ensure that users are communicating with the legitimate website
and not an imposter.
- Maintain
data integrity to ensure that the data is not tampered with
during transmission.
When a web server is configured with SSL/TLS, it typically
uses the HTTPS protocol, indicated by the padlock icon in the browser’s address
bar. This assures visitors that their connection to the site is secure and
their information is protected
25.Now, let's jump into the section SSL/TLS. To enable SSL/TLS go to Security and click on SSL/TLS Manager.

26.Select
the Site URL on which you want to configure the SSL and click on "Configure".
Here, we will configure the site prakashchhetry.cloudns.be

Before moving to Step 27, lets know about Private Key,CSR and Certificate:
In the context of a web hosting server, a private
key, CSR (Certificate Signing Request), and certificate are
all components of the SSL/TLS protocol, which is used to secure communications
between a web server and its clients. Here’s a brief explanation of each term:
- Private
Key: This is a secret key that is kept secure on the server. It is
used to decrypt information encrypted with the corresponding public
key. It’s crucial that this key remains confidential because anyone
with access to it can decrypt the server’s communications.
- CSR
(Certificate Signing Request): This is a request sent to a Certificate
Authority (CA) when applying for an SSL/TLS certificate. It contains
information that will be included in the certificate, such as the
organization’s name and the domain to which the certificate will be
issued. The CSR also includes the public key that will be included in
the certificate.
- Certificate:
This is a digital document issued by a CA that verifies the ownership of a
public key by the named subject of the certificate. This is what users’
browsers check to establish a trusted connection with a web server. The
certificate contains the public key and the identity of the owner (such as
the domain name), and it’s signed by the CA to prevent tampering.
When setting up a secure web server, you would first
generate a private key and a CSR, then submit the CSR to a CA. The CA would
then issue a certificate based on the CSR, which you would install on your web
server along with the private key to enable secure communications.
27.Click
on “Generate Key/CSR “.

28.Clicking
on “Generate Key/CSR “will redirect you to this page where, you need to fill up
the details. After entering all the details click on “Generate Key”.

29. It will generate the “Private Key” and “CSR” which are required during the creation of the certificate.

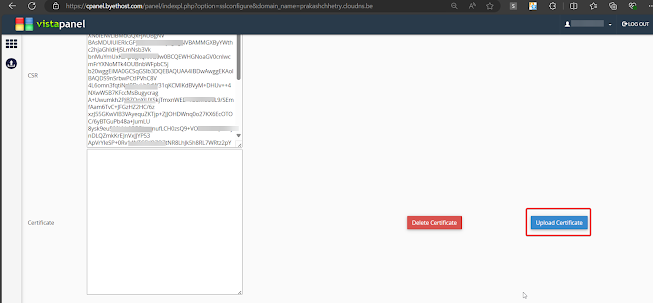
30.On
scrolling down, you will also see the certificate field is left blank. Since, we are using
the trial, we do not have the certificate available in the hosting server thus,
lets download the free certificate from another SSL/TLS certificate provider
and lets link that certificate in the hosting server.
Before moving to Next Chapter, lets know about SSL/TLS,Free SSL Certificates etc.:
Securing Your Website with SSL/TLS: Now, we’ll focus on implementing SSL/TLS encryption. This is a critical step in ensuring that your website’s communication is secure, signified by the ‘https://’ in your website’s URL. We’ll guide you through:
Obtaining a Free SSL Certificate: Many hosting services offer free SSL certificates through Let’s Encrypt but here we will download the certificate from different SSL service provider and then We’ll show you how to activate it in cPanel.
Installing SSL on Your Domain: With the certificate in hand, we’ll proceed to install it for your domain. This process involves a few simple steps within cPanel to ensure your website is recognized as secure by browsers.
Enabling HTTPS: Finally, we’ll ensure that your website defaults to a secure HTTPS connection, providing peace of mind for you and your visitors.
Now let's move on to the steps on how to register and download the certificate for your website:
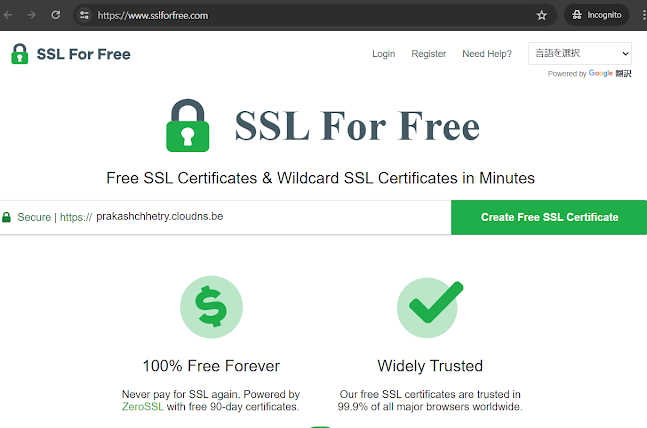
1.There are many SSL Certificate provider, but for this demonstration I am using "SSLForFree"which allows 90 days of free SSL Certificate. Open the URL and type your domain name and click on "Create Free SSL Certificate".
2.Sign Up the account by entering the "Email Address", "Password". 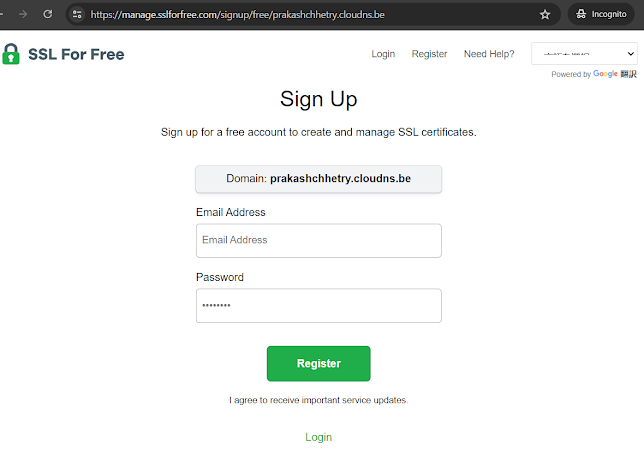

4.Select "90-Day Certificate" because 1 Year Certificate is not available for free.

5.In this step,do not turn on these the buttons and click on "Next Step".Turning on is available on the PRO version only.

6.Here, you need to paste the CSR that we have generated previously in Step 29 previously

7.A free certificated is selected. Click on "Next Step".

8.Certificate has been created but you need to verify the domain prakashchhetry.cloudns.be . For that you can choose three methods:
- Email Verification
- DNS (CNAME)
- HTTP File Upload
By default, Email Verification is chosen, Since we don’t have
the domain email address within this domain, so we will verify it with CNAME. Click on "DNS (CNAME)".


10.The “CNAME”
records has been updated. It will take some time to update based upon the domain registrar.

11.After the addition of “CNAME” Records in domain registrar.
Once again come back to the previous step 8 and click “Next Step”.

12.For domain ownership verification, click on “Verify Domain”.

13.In this step, either you can leave the “default” option or
you can choose the “Server Type” and click “Next Step”.

14.Now, click on “Download Certificate”.

15.Go to the location where .zip file is downloaded. Extract
the file and open it. You will see “ca_bundle.crt” and “certificate.crt”.

16.Do not double click the file, it will prompt you to install
the file on the machine that you are working but the requirement is to install
the certificate in cPanel. Thus, right click and click on edit as notepad.

17.Copy the above certificate and paste it in the "Certificate" field.
After pasting click on “Update Certificate”. If no error occurred on clicking
on “Upload Certificate” , then you are good to go.

18.Now, back again to the folder where we have uploaded the
index.html you will be able to see the file named “.htaccess”. Right click and edit
the file.

Before moving to Step 19, lets know about .htaccess:
The web server does not automatically redirect HTTP to HTTPS, it needs to be explicitly instructed. (.htaccess) configuration file is the file used on web servers running the Apache Web Server software, and it allows you to make changes to the server’s behavior without altering the main configuration files.
Without such a script in the .htaccess file, the
server would serve the content over HTTP by default, which is not secure.
Therefore, the script ensures that all traffic is served over HTTPS, providing
a secure connection for your users. It’s a proactive step to ensure security
and privacy for your website’s visitors. Remember, it’s always better to be
safe than sorry, especially when it comes to web security!
19.Here, I have written some script which will redirect
the http:// traffic to https://.This step may vary as per the hosting
server. If you are hosting WordPress website then https:// redirection might be
in the admin console.

20.Now, when enter the URL https://prakashchhetry.cloudns.be it
will land the page and shows that the website is secure. Also, when I only type www.prakashchhetry.cloudns.be or prakashchhetry.cloudns.be it is will redirect me to the page https://prakashchhetry.cloudns.be ,You can also redirect it from the domain registrar by adding the “WR” record.

21.In the domain Registrar, I am adding the new record which will redirect my page. When anyone type www.prakashchhetry.cloudns.be
then it will land the page https://prakashchhetry.clounds.be

22.Here you can see the “WR” has been added. Now, for example if you type www.prakashchhetry.cloudns.be or http://prakashchhetry.cloudns.be or prakashchhetry.cloudns.be, in any of the case, you will be redirected to https://prakashchhetry.cloudns.be.

23.Now, before checking the result. I am going to edit the page
and modify the code on it.

24.Now,on browsing the URL, It will display the page that I have updated lately..😊😊😊

Let’s wrap up this demo.
I’ve shown you how to make your website available for everyone to see. We talked about how to get a domain name, where your website lives on the internet, and how to set up a security certificate. I used cPanel to show you this, but remember, most servers work in a similar way. Some steps might be a bit different, depending on the hosting and domain companies you choose. I hope everything’s clear now. Thanks!