
Outlook Training Day 9 – Join or Create distribution group without logging in to admin console
Distribution Groups (also called distribution lists) is the group in which multiple
users can be added and is the solution for the users to communicate and collaborate
with colleagues. Also, the distribution list comes with the shared mailbox.
Below demonstration shows how the users can join the existing public group
or create a new distribution group.
On the settings (gear) click on "view all outlook settings".

On the
general option, select distribution group. on the left you will see the option
to “Distribution groups I belong to” and on the right you will see the
option “Distribution group I own”. You can search and join the existing
public group from the join option available at “Distribution group I belong
to”. To create a new distribution group, click on the “+” sign available
which is highlighted in the picture below.

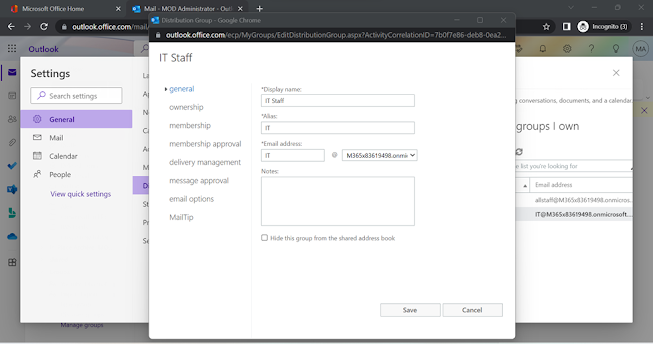
Enter Display Name, Alias, Email address etc. If you have the custom domain, you can choose from the drop down list available instead of
“******.onmicrosoft.com”

If you scroll down, you will see the option to add the owners and the
members. For example to add the members in the distribution group click on the
“+” sign as highlighted in the picture below.

From the default global address list, add the email address to which you
want to add to the distribution list and click on save.

Scroll
down, you will see more options. For example, choose weather owner approval is required
to join the group and choose weather the group is open to leave. You can choose
the group to be open or closed based on the purpose of the group creation.
After the necessary configuration click on save.

The information has been saved successfully.

Now, you will be able to see the distribution group that you have created. it@m365x83619498.onmicrosoft.com is the email address of the
distribution that was created in this demonstration. You can click on edit or
double click on the group created if you want to make any changes later.

After clicking on edit, on the “General” you will see the general
things that can be modified.
By clicking on to the ownership tab you can add or remove the owner of the
group.

By clicking on to the membership tab you can add or remove the members of
the group.

By clicking on the membership approval, you can change the settings related
to joining and leaving the group.

By clicking on the delivery management, you can set the options that the
distribution group can be reachable either only to the user inside the
organization or the senders inside and outside of my organization.

By clicking on the message approval, you can assign the group moderator.
The message set to the group can also be controlled by the moderator assigned.

Now
let’s test the distribution group by sending the email address to the
distribution group. In this demonstration we have also assigned the user admin@m365x83619498.onmicrosoft.com as the member of the group thus
if the email sent to the address it@m365xm365x83619498.onmicrosoft.com then the it should be sent to
each of the member of the group.

The email which was sent to the distribution group has now received in the
inbox of each of the members of the group. As the user admin@m365x83619498.onmicrosoft.com was already a member of IT group
the email is received.

