Recording
Any Teams meeting or call be recorded for future viewing. The recording captures audio, video, and screen sharing activity, and you can share it securely across your organization.
The recording will expire and be automatically deleted after a set of time. The length of time it’s available is set by your admin, but you can change the expiration date of any given recording.
Note:
Meeting recordings won’t capture whiteboards, annotations, shared notes and won’t include videos or animations embedded in PowerPoint Live presentations.
When you view a meeting recording, you’ll see no more than four peoples’ video stream at once
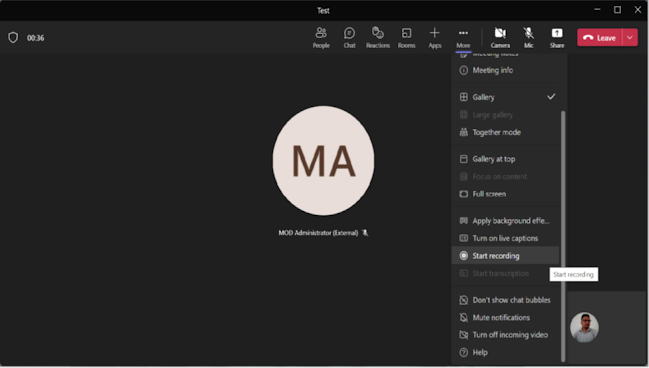
Click on More … & Click "Start recording"
You will see a pop up that the recording has been started
If you wish to stop the recording, go back to the same option, and click "Stop recording".
The recording is now saved and ready to be viewed.
In the Chat you will see the recorded session. Click on the …3 dots, you will see the option to Open, get link, learn more and Report a Problem. If you want to open the saved video then click on Open.
The video will get open through the default browser. Click on play and view the recorded video.
You can share the video to the people inside/outside of the organization.
You can also control the access during the content sharing for that, you need to click on Manage access. If you want to further control, then click on click on advanced option and apply the necessary permission like ready only etc. Once everything is configured click on Share
Type the email address to whom you want to share.
Result:
The user receives the email notifying that someone has shared a file.
The recipient will now be able to view the shared video.


